
Deck Staining Prep: Why Cleaning and Sanding Decide How Long Your Stain Lasts
 October 19, 2026
 By
Art Evans & Sons
 October 19, 2026
 By
Most homeowners who are unhappy with a stained deck blame the stain. It peeled, it faded, it turned blotchy after one summer, so the product must have been bad. In reality, the stain is rarely the problem. The work that happens before the can is opened usually decides whether a deck looks good for years or starts failing by next season.
Deck staining is different from painting a wall. Stain is meant to soak into the wood, not sit on top of it like a film. Anything that blocks that absorption, whether dirt, mildew, old finish, sanding dust, or trapped moisture, gives the new stain a weak foundation. This guide explains what proper prep involves, why each step matters, and how to tell whether a deck is actually ready to be stained.
Why Prep Matters More Than the Stain Itself
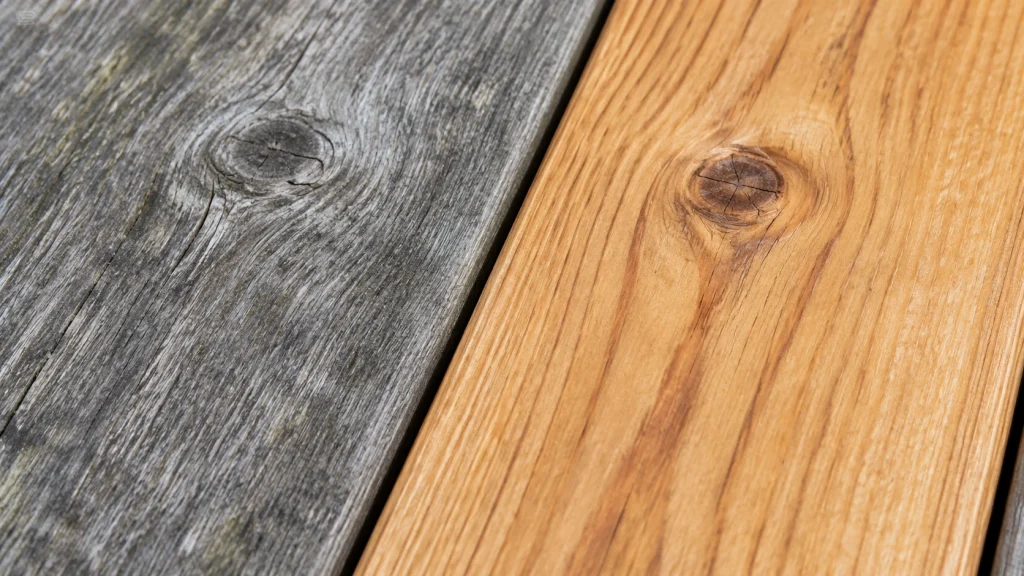
A quality deck stain protects wood from UV light and moisture. It can only do that if it reaches the wood fibers. When a deck is dirty, greasy, mildewed, or still coated with a failing old finish, the stain bonds to the surface layer instead of the wood. That surface layer eventually lets go, and the stain goes with it.
This is why peeling and flaking after a staining job almost always trace back to the surface that was stained, not the stain that was applied. Applying stain over mildew is a good example. It does not kill the growth, and it can trap moisture against the wood, which speeds up deterioration instead of preventing it.
Prep also affects appearance. Uneven cleaning leaves blotchy patches. Skipped sanding leaves rough, raised grain that catches the stain unevenly. Leftover dust turns into a gritty finish. Good prep is what makes the final result look consistent from the first board to the last.
What Ohio Weather Does to a Deck
A deck in southwest Ohio goes through a lot in a single year. Winters bring freeze and thaw cycles that push moisture in and out of the wood. Spring is wet. Summers are humid, which encourages mildew on shaded boards, and then the sun bakes exposed surfaces. By fall, an unprotected deck has often turned gray and started to check and splinter.
Those conditions are why prep and timing matter so much locally. Wood that is damp from a rainy week will not accept stain properly. Wood that has been scorched by afternoon sun can dry the stain too fast. The best staining conditions are a stretch of dry weather with moderate temperatures, and the deck needs enough time to dry after cleaning. Planning around the forecast is part of the prep, not an afterthought.
How to Tell Whether Your Deck Is Ready for Stain
Before doing anything, find out what you are dealing with. A few quick checks tell you a lot.
Try the water test. Sprinkle some water on the boards. If the droplets soak in within a short time, the wood can absorb stain. If the water beads and sits on the surface, there is probably a sealer, an old stain, or a weathered coating that has to come off first.
Look for gray, black, or green patches. Graying means the surface wood fibers have been damaged by UV exposure. Black or green spots usually point to mildew or algae, especially on shaded or north-facing sections.
Check the old finish. If the previous stain is peeling or flaking in places, patching those spots will not work. The remaining finish has to be dealt with across the whole deck so the new stain goes down evenly.
Inspect the boards and fasteners. Look for cracked or soft boards, popped nails, and loose railings. Fixing structural problems before staining is far easier than doing it afterward.
The Seven Steps of Proper Deck Staining Prep
The exact process depends on the condition of the deck and the type of stain going on, so always follow the stain manufacturer’s directions. In general, thorough prep follows this order.
1. Clear, Sweep, and Inspect
Move furniture, planters, and grills off the deck. Sweep away leaves and debris, and clear the gaps between boards, where dirt and moisture collect. This is also the time to replace damaged boards, set raised nails, and tighten loose hardware. If a deck or railing was painted many years ago, be aware that older paint can contain lead. Sanding or scraping it creates dust, so take proper precautions or hire someone who does.
2. Remove Old Finish if Necessary
If the deck was previously stained or sealed and the finish is failing, it needs to come off. Stain and sealer removers are designed for this. They are typically applied while the surface stays wet, worked into the wood, and then rinsed thoroughly. Manufacturers generally recommend a remover on any previously finished wood so the new stain can penetrate rather than sit on leftover coating.
3. Clean the Wood
Even a deck that looks fine usually carries dirt, pollen, mildew, and grime. A deck cleaner formulated for wood loosens that buildup. For mildew, use a product made to address it, since ordinary cleaning often leaves spores behind. Even brand new wood needs cleaning, because new lumber can carry mill glaze and surface residue that interfere with absorption.
4. Brighten the Wood
A wood brightener is the step many DIY projects skip. After cleaning or stripping, a brightener helps neutralize the wood and restores some of its natural color, which is especially helpful on gray, weathered boards. It also helps open the surface so stain absorbs more evenly. Think of it as resetting the wood so it is ready to take color properly.
5. Rinse Thoroughly and Let the Deck Dry
Rinse every product off completely. Leftover cleaner or remover residue can interfere with the stain. Then wait. Manufacturers commonly call for the wood to dry for roughly 24 to 48 hours before staining, and longer in damp or humid weather. Staining too soon is one of the most common mistakes, because trapped moisture keeps the stain from penetrating and can cause it to fail early.
If you use a pressure washer, be careful. High pressure can gouge soft wood and raise the grain. A wide tip, a distance of about 8 to 12 inches from the surface, and passes that follow the direction of the grain all reduce the risk of damage.
6. Sand the Surface
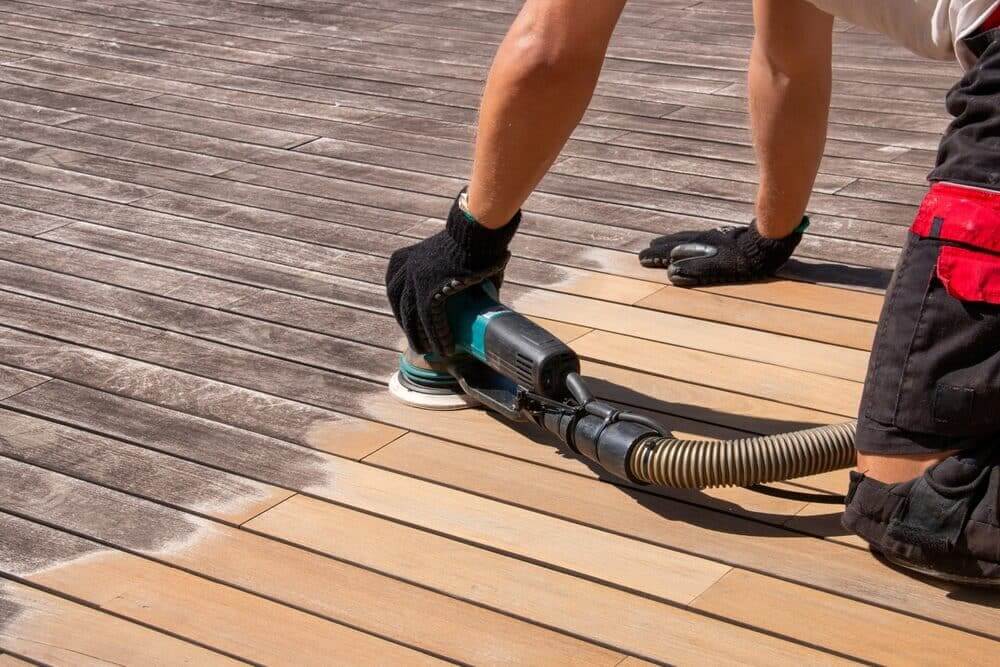
Cleaning and brightening raise the wood grain slightly, and weathered boards develop rough spots and loose fibers. Sanding with medium grit paper, commonly 80 to 100 grit, smooths the surface and helps stain absorb uniformly. Sand with the grain, give extra attention to handrails and any area people touch, and replace worn paper as you go. Sanding after cleaning rather than before is the usual recommendation, because it removes the roughness the cleaning raised.
7. Remove Dust and Test Again
Sanding creates fine dust that has to be swept or blown off, then wiped or rinsed away as the product directions allow. Dust left on the deck mixes into the stain and leaves a rough finish. Once the surface is clean, repeat the water test. If water soaks in, the deck is ready. It is also smart to test the stain on an inconspicuous area first, since the same stain can look different on different wood.
Timing Matters as Much as Technique
Even a perfectly prepped deck can be ruined by bad conditions on staining day. Avoid staining in direct, intense sun, which can make the stain dry unevenly and leave lap marks. Avoid days when rain is in the forecast, because rain can wash away stain before it has dried. High humidity slows drying and can trap moisture, while very low humidity can make the stain dry too fast.
A stretch of dry weather with moderate temperatures is ideal. A common rule of thumb is to look for a forecast that stays dry for at least a day and a half after the prep is done and the stain goes on. In Ohio, that often means late spring or early fall, though a good weather window matters more than any specific date.
Common Deck Staining Prep Mistakes
Knowing what goes wrong helps you avoid it. These are the problems that show up most often.
Skipping the cleaner because the deck “looks clean.” Surface dirt, mildew spores, and oils are not always visible, and they all block absorption.
Staining over old failing finish. New stain cannot bond properly to a coating that is already letting go.
Not letting the wood dry. Impatience after cleaning is the single biggest cause of early stain failure.
Sanding too coarse or not sanding at all. Coarse paper leaves scratches that show through the stain, while skipped sanding leaves raised grain and uneven color.
Leaving dust on the surface. It ends up in the finish and creates a gritty feel.
Using too much pressure. A pressure washer set too aggressively fuzzes the wood and creates work later.
Mixing too little stain. Stain color can vary between batches, so for larger decks it helps to mix enough product together before starting to keep the color consistent.
New Wood Versus Older Wood
New pressure-treated or cedar lumber is not automatically ready to stain. New boards can have a slick surface from the milling process and can hold moisture from treatment or storage. Many stain makers recommend letting new wood weather and dry for a period and then cleaning and lightly sanding before applying stain. The right waiting time depends on the wood and the product, so check the stain’s technical data sheet.
Older decks usually need more work: removing old finish, treating mildew, brightening gray wood, and sanding out rough spots. They also may need repairs first. A deck with soft or rotting boards needs those boards replaced, because stain cannot fix structural damage.
Is DIY Deck Staining Prep Worth It?
Plenty of homeowners do their own staining, and it can be done well. The catch is that prep is the most time-consuming part. Cleaning, brightening, waiting for dry weather, sanding every board, handrail, and spindle, and then staining within a favorable window adds up to more than a weekend for many decks. A mistake in the prep stage is hard to see until the stain starts to fail months later.
Hiring a professional makes sense when the deck is large, heavily weathered, previously finished with something unknown, or hard to access. It also makes sense when you want the job done within a good weather window. When comparing contractors, ask what their prep process includes, what products they use, and how they handle drying time between steps. A contractor who describes cleaning, drying, and sanding clearly is a better sign than one who only talks about which stain they apply. If you want a sense of how exterior projects are priced, the Art Evans & Sons guide to exterior painting costs in Oxford covers what affects the price of outdoor work.
Frequently Asked Questions About Deck Staining Prep
Do I really need to sand before staining a deck?
In most cases, yes. Sanding smooths raised grain and rough spots left by weathering and cleaning, and it helps stain absorb evenly. Many stain manufacturers recommend lightly sanding after cleaning and brightening, then removing all the dust.
How long should a deck dry after cleaning before I stain it?
Most guidance calls for about 24 to 48 hours of dry time, depending on temperature, humidity, and sun exposure. A quick way to check is the water test. If droplets soak into the wood rather than beading on top, the deck is likely ready.
Can I just pressure wash and stain?
Pressure washing alone is rarely enough. It can remove loose dirt, but it does not address old finish, mildew, or mill glaze, and used carelessly it can damage the wood. Cleaning, brightening, drying, and sanding are what set the stain up to last.
Get Your Deck Ready for Stain the Right Way
A stain job is only as strong as the preparation under it. If you would rather not spend your weekends cleaning, sanding, and watching the forecast, Art Evans & Sons can help with your exterior and deck staining project here in Oxford, Ohio, and the company backs its work with a limited seven-year warranty. Call us today at (513) 523-6425 for a free quote and analysis of your deck.
Author Info
